

Use AWS Copilot CLI to deploy containers on existing infrastructure - Tutorial
This tutorial shows how you can easily deploy containers on your existing VPC with AWS Copilot CLI.


Introduction
When you start a project where you're containerizing your applications, it's pretty easy to get started locally and develop your container images. But when you plan to deploy these containers in the Cloud it can be quite a challenge and a lot of work to set up the required infrastructure to run these containers.
That's where AWS Copilot CLI comes in. This is a tool that allows developers to build, release, and operate production-ready containerized applications on Amazon ECS and AWS Fargate. Essentially it does the heavy lifting for you and creates the required infrastructure using CloudFormation. That means in a matter of minutes, you're able to deploy your containers in your AWS account. Where normally it would take at least a day to set up the required orchestration using CloudFormation.
One of the most useful features of AWS Copilot that I discovered (released in v0.3) was that you can configure AWS Copilot to use pre-existing VPC, subnets, and CIDR ranges. This is a huge advantage when you're in the middle of the development phase of a project.
You might ask, why is that the case? That's because you can use your existing Infra as Code tool to deploy resources such as RDS, Elasticache, and EFS and connect them to your AWS Copilot containers. That way you can quickly set up a working container environment. In the meantime, you or your teammates can work on replicating what you've deployed with AWS Copilot in your preferred Infra as Code tool e.g. CloudFormation, CDK, or Terraform.
So in this post, I'll show you how you can deploy containers on your existing VPC with AWS Copilot. As a reference case, we'll be deploying the following Django example App and combine it with cloud-native services like Elasticache (Redis), RDS (Postgress) & Secrets Manager.
Table of Contents
- Introduction
- Prerequisites
- 1. Initializing the App
- 2. Initialize the test environment in the existing VPC
- 3. Deploy RDS + Elasticache
- 4. Initialize the Django app service
- 5. Update the manifest with the RDS and Redis connection variables
- 6. Deploy the Django example service
- 7. Login on the container
- 8. Wrapping up: Delete the service
Prerequisites
The following prerequisites are needed for the container deployment with this AWS Copilot tutorial:
- Install Docker
- Install AWS Copilot CLI
- Set up an AWS Account
- Deploy your preferred VPC (including subnets) or use the template I created for this tutorial
Once the prerequisites are set up, we can start with the next steps to use AWS Copilot to deploy the service within the existing VPC.
1. Initializing the App
First clone the project that we're going to use for this example:
❯ git clone git@github.com:dannysteenman/docker-django-example.git
Then we're going to initialize the application in AWS Copilot:
> An application is a group of related services, environments, and pipelines. Whether you have one service that does everything or a constellation of micro-services, Copilot organizes them and the environments they're deployed to into an "application". Source
In this case, we deploy one AWS Copilot App with the following command:
❯ copilot app init django-example-copilot
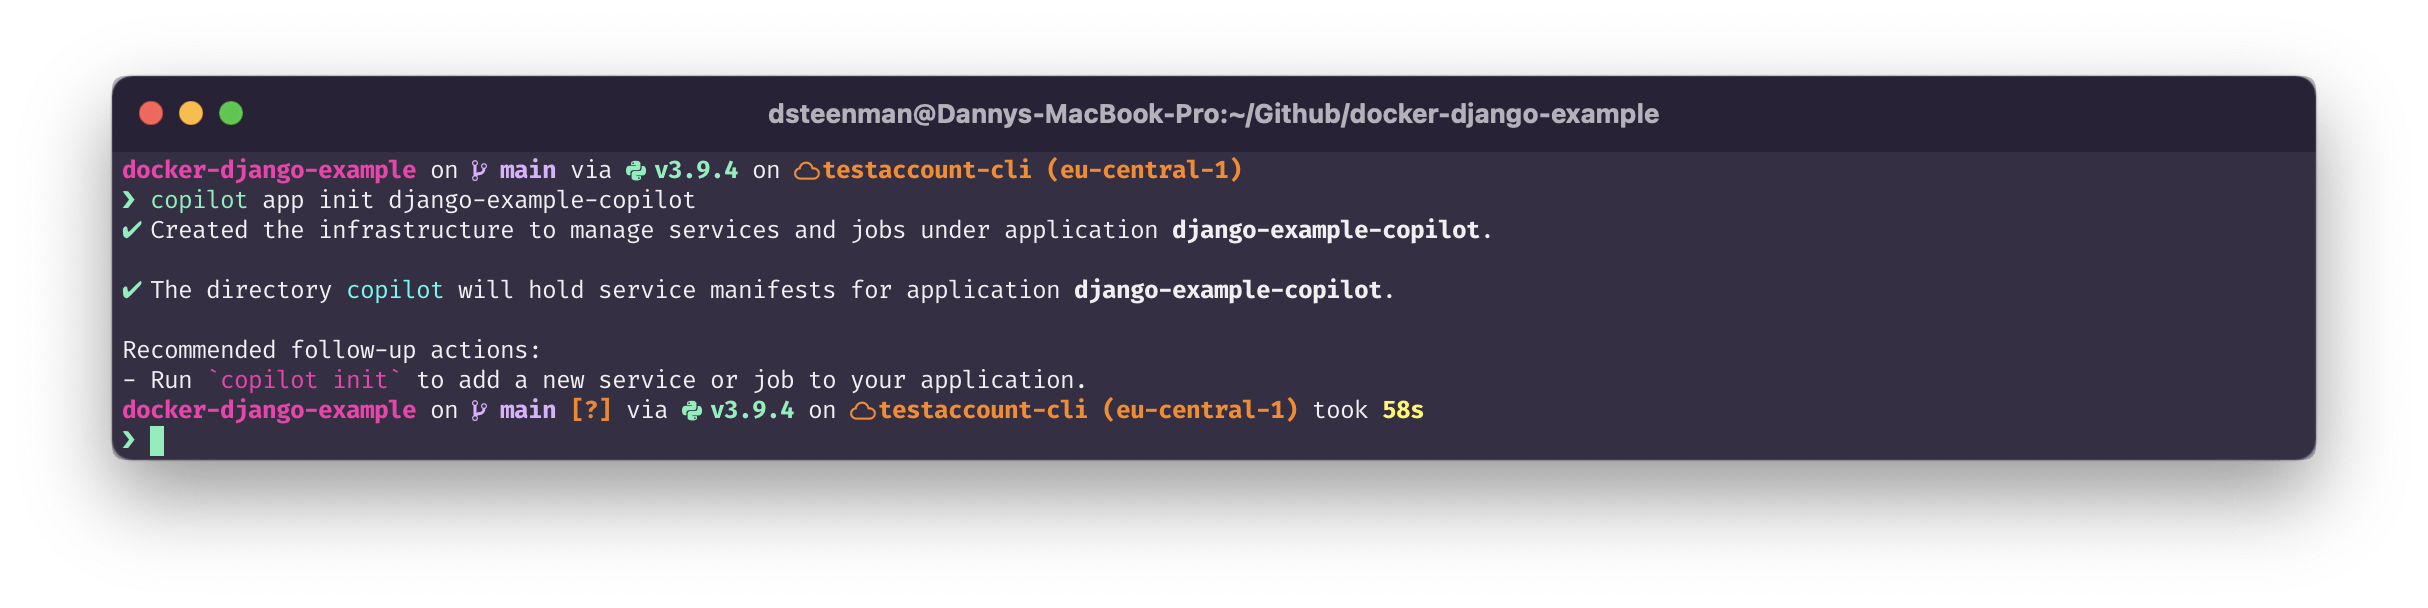
It will create a copilot/.workspace file in the root of your project folder and deploys the required roles on the account which you exported in your CLI.
2. Initialize the test environment in the existing VPC
Now we're going to set up the environment in which we want to deploy the application. Since we're going to use our existing VPC we're going to add the --import-vpc-id argument. By doing this we prevent AWS Copilot from creating it's own VPC and networking:
❯ copilot env init -n test --import-vpc-id vpc-0a0a8fe59ebbe825a --import-public-subnets subnet-0bf192b5dd6b69353,subnet-0e84a756ecfe675d8,subnet-0e85448003c9363e6 --import-private-subnets subnet-02b1d1c235d8b7b0a,subnet-021979e65464bffa5,subnet-0968fa1ad198daed9
This deploys the ECS cluster in the imported VPC and uses 3 public subnets and 3 private subnets (separated over 3 AZ's).

3. Deploy RDS + Elasticache
For this setup, we're going to connect the containers with an RDS database and Elasticache Redis node. These are services that don't require containerized setup and require less maintenance than containers.
In the repository, you'll find 2 CloudFormation templates that deploy a Postgres RDS with AWS Secretsmanager and an Elasticache Redis cluster. Deploy these templates in your existing VPC and make sure to fill the parameters with the correct values.
4. Initialize the Django app service
The repository contains the docker file that builds the Django image. We're going to create a Load Balanced Web Service. This will create an ALB with a target group that allows us to access the Django container from the internet. To do that we need to run AWS Copilot to set up the manifest file to make it ready for deployment.
❯ copilot svc init --name django-example --svc-type "Load Balanced Web Service" --dockerfile ./Dockerfile
This will create the ECR repository in which AWS Copilot will upload the container image for that specific service.
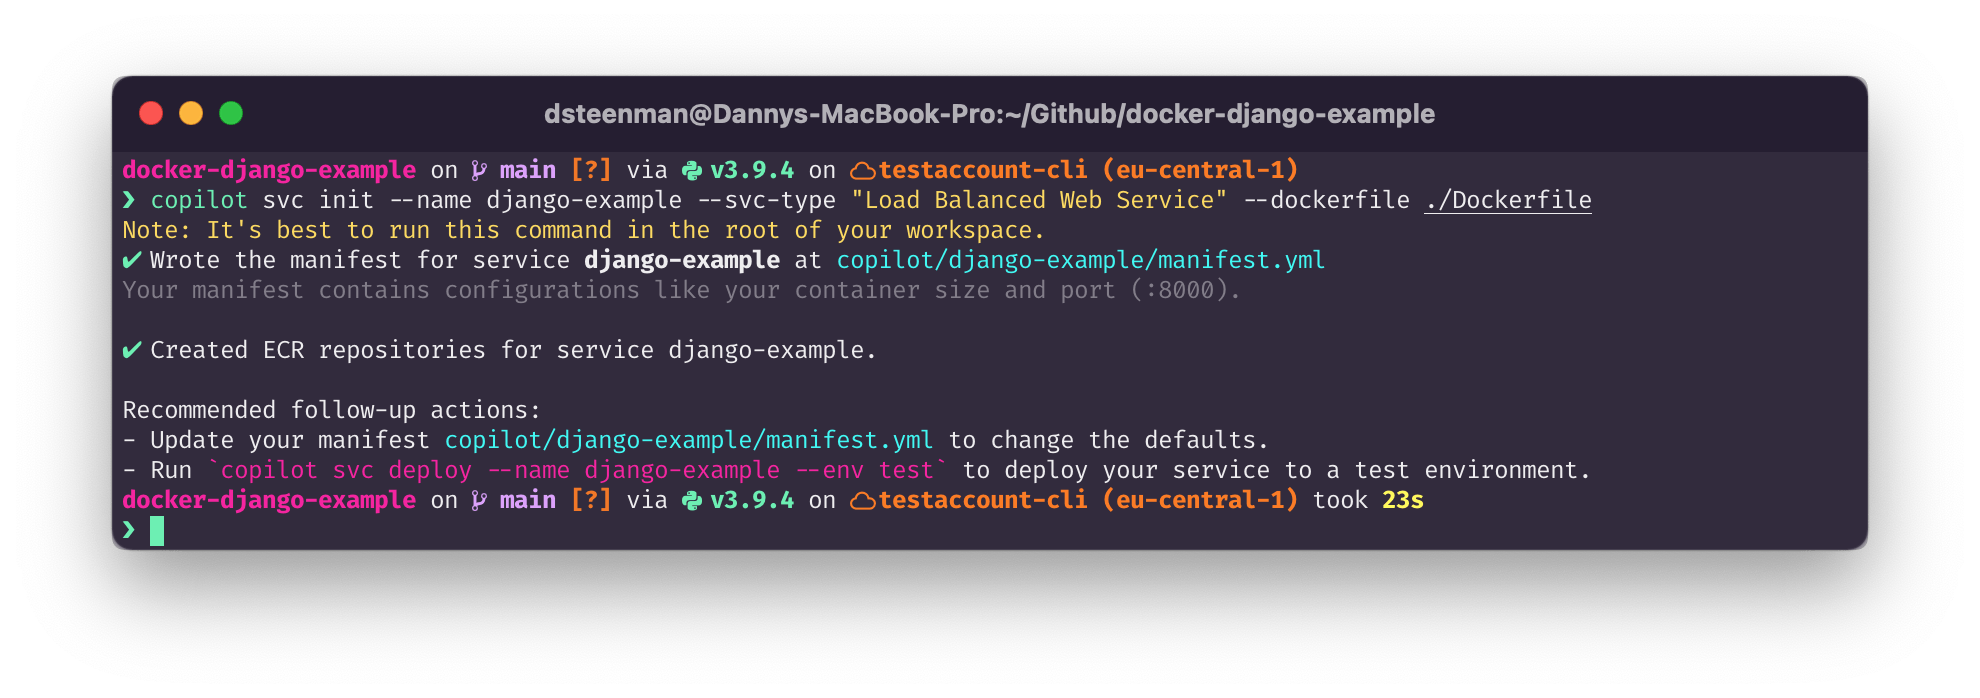
It will also generate a manifest file in copilot/django-example/manifest.yml. This file is used by AWS Copilot to generate and deploy a CloudFormation template for that specific ECS Service. The manifest gives you an easy way to adjust the configuration of your container and service, the generated file looks like this:
# The manifest for the "django-example" service.
# Read the full specification for the "Load Balanced Web Service" type at:
#  https://aws.github.io/copilot-cli/docs/manifest/lb-web-service/

# Your service name will be used in naming your resources like log groups, ECS services, etc.
name: django-example
type: Load Balanced Web Service

# Distribute traffic to your service.
http:
  # Requests to this path will be forwarded to your service.
  # To match all requests you can use the "/" path.
  path: "/"
  # You can specify a custom health check path. The default is "/".
  # healthcheck: '/'

# Configuration for your containers and service.
image:
  # Docker build arguments. For additional overrides: https://aws.github.io/copilot-cli/docs/manifest/lb-web-service/#image-build
  build: Dockerfile
  # Port exposed through your container to route traffic to it.
  port: 8000

cpu: 256 # Number of CPU units for the task.
memory: 512 # Amount of memory in MiB used by the task.
count: 1 # Number of tasks that should be running in your service.
exec: true # Enable running commands in your container.

# Optional fields for more advanced use-cases.
#
#variables:                    # Pass environment variables as key-value pairs.
#  LOG_LEVEL: info

#secrets:                      # Pass secrets from AWS Systems Manager (SSM) Parameter Store.
#  GITHUB_TOKEN: GITHUB_TOKEN  # The key is the name of the environment variable, the value is the name of the SSM parameter.

# You can override any of the values defined above by environment.
#environments:
#  test:
#    count: 2               # Number of tasks to run for the "test" environment.
5. Update the manifest with the RDS and Redis connection variables
The original docker-compose file of this project creates separate containers for the database and cache. But since we replaced them with their Cloud-native counterparts (RDS and Elasticache), we need to inject variables in the container, so they can be used by the Django application settings.
The Django app settings (src/config/settings.py) luckily already support environment variables for the Database and Redis settings. So all you need to do is add your own custom variables into the manifest:
variables:
  ALLOWED_HOSTS: "*"
  DEBUG: true
  NODE_ENV: development
  POSTGRES_DB: postgres
  POSTGRES_HOST: <insert the endpoint from the RDS resource you created>
  POSTGRES_PORT: 5432
  REDIS_URL: redis://<insert the Redis endpoint from the Elasticache resource you created>:6379/0
  SECRET_KEY: change_me


secrets:
  POSTGRES_USER: "'arn:aws:secretsmanager:region:accountid:secret:secretname:username::'"
  POSTGRES_PASSWORD: "'arn:aws:secretsmanager:region:accountid:secret:secretname:password::'"
A colleague of mine found out by trial and error that it's possible to use AWS Secrets Manager in the AWS Copilot manifest. So we're using that to securely pass the secret into the container.
Note: Make sure to tag your AWS Secrets or AWS Parameters with the following tags (key-value):
copilot-environment: test
copilot-application: django-example
This is necessary in order for AWS Copilot to make use of the parameters and secrets. The execution role in the CloudFormation template that AWS Copilot deploys contains a condition to only accept tagged secrets and parameters that are intended to be used for this tool. Down below you see the actual template that AWS Copilot generates:
  ExecutionRole:
    Metadata:
      'aws:copilot:description': 'An IAM Role for the Fargate agent to make AWS API calls on your behalf'
    Type: AWS::IAM::Role
    Properties:
      AssumeRolePolicyDocument:
        Statement:
          - Effect: Allow
            Principal:
              Service: ecs-tasks.amazonaws.com
            Action: 'sts:AssumeRole'
      Policies:
        - PolicyName: !Join ['', [!Ref AppName, '-', !Ref EnvName, '-', !Ref WorkloadName, SecretsPolicy]]
          PolicyDocument:
            Version: '2012-10-17'
            Statement:
              - Effect: 'Allow'
                Action:
                  - 'ssm:GetParameters'
                Resource:
                  - !Sub 'arn:aws:ssm:${AWS::Region}:${AWS::AccountId}:parameter/*'
                Condition:
                  StringEquals:
                    'ssm:ResourceTag/copilot-application': !Sub '${AppName}'
                    'ssm:ResourceTag/copilot-environment': !Sub '${EnvName}'
              - Effect: 'Allow'
                Action:
                  - 'secretsmanager:GetSecretValue'
                Resource:
                  - !Sub 'arn:aws:secretsmanager:${AWS::Region}:${AWS::AccountId}:secret:*'
                Condition:
                  StringEquals:
                    'secretsmanager:ResourceTag/copilot-application': !Sub '${AppName}'
                    'secretsmanager:ResourceTag/copilot-environment': !Sub '${EnvName}'
6. Deploy the Django example service
Now that we've updated the manifest it will look something like this:
# The manifest for the "django-example" service.
# Read the full specification for the "Load Balanced Web Service" type at:
#  https://aws.github.io/copilot-cli/docs/manifest/lb-web-service/

# Your service name will be used in naming your resources like log groups, ECS services, etc.
name: django-example
type: Load Balanced Web Service

# Distribute traffic to your service.
http:
  # Requests to this path will be forwarded to your service.
  # To match all requests you can use the "/" path.
  path: "/"
  # You can specify a custom health check path. The default is "/".
  # healthcheck: '/'

# Configuration for your containers and service.
image:
  # Docker build arguments. For additional overrides: https://aws.github.io/copilot-cli/docs/manifest/lb-web-service/#image-build
  build: Dockerfile
  # Port exposed through your container to route traffic to it.
  port: 8000

cpu: 256 # Number of CPU units for the task.
memory: 512 # Amount of memory in MiB used by the task.
count: 1 # Number of tasks that should be running in your service.
exec: true # Enable running commands in your container.

# Optional fields for more advanced use-cases.
#
variables: # Pass environment variables as key value pairs.
  ALLOWED_HOSTS: "*"
  DEBUG: true
  NODE_ENV: development
  POSTGRES_DB: postgres
  POSTGRES_HOST: <insert the endpoint from the RDS resource you created>
  POSTGRES_PORT: 5432
  REDIS_URL: redis://<insert the Redis endpoint from the Elasticache resource you created>:6379/0
  SECRET_KEY: change_me

secrets: # Update the region, accountid and secretname of the Secret Manager secret
  POSTGRES_USER: "'arn:aws:secretsmanager:region:accountid:secret:secretname:username::'"
  POSTGRES_PASSWORD: "'arn:aws:secretsmanager:region:accountid:secret:secretname:password::'"

# You can override any of the values defined above by environment.
#environments:
#  test:
#    count: 2               # Number of tasks to run for the "test" environment.
Don't forget to update the Redis and Postgress endpoints, which you deployed earlier. We can then use this manifest to deploy the container into our ECS cluster. Run the following command to deploy the service with AWS Copilot:
❯ copilot svc deploy --name django-example --env test
It will now start building the Docker image from the Dockerfile in your repository:
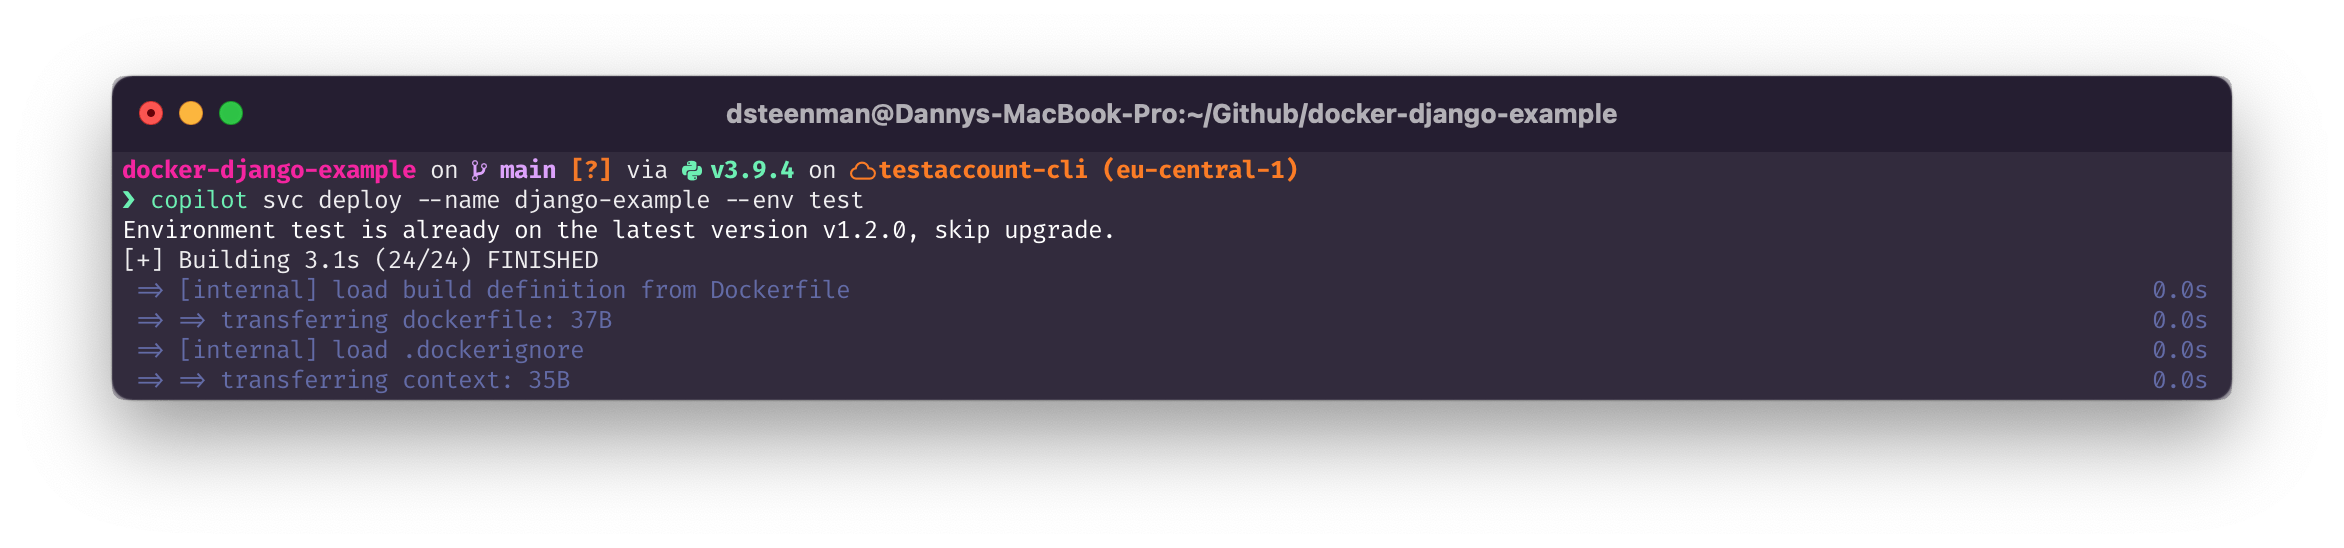
After creating the image it will push it to ECR and start deploying it by updating the CloudFormation template. From the CLI you're able to watch the progression of the deployment and eventually it should finish successfully.
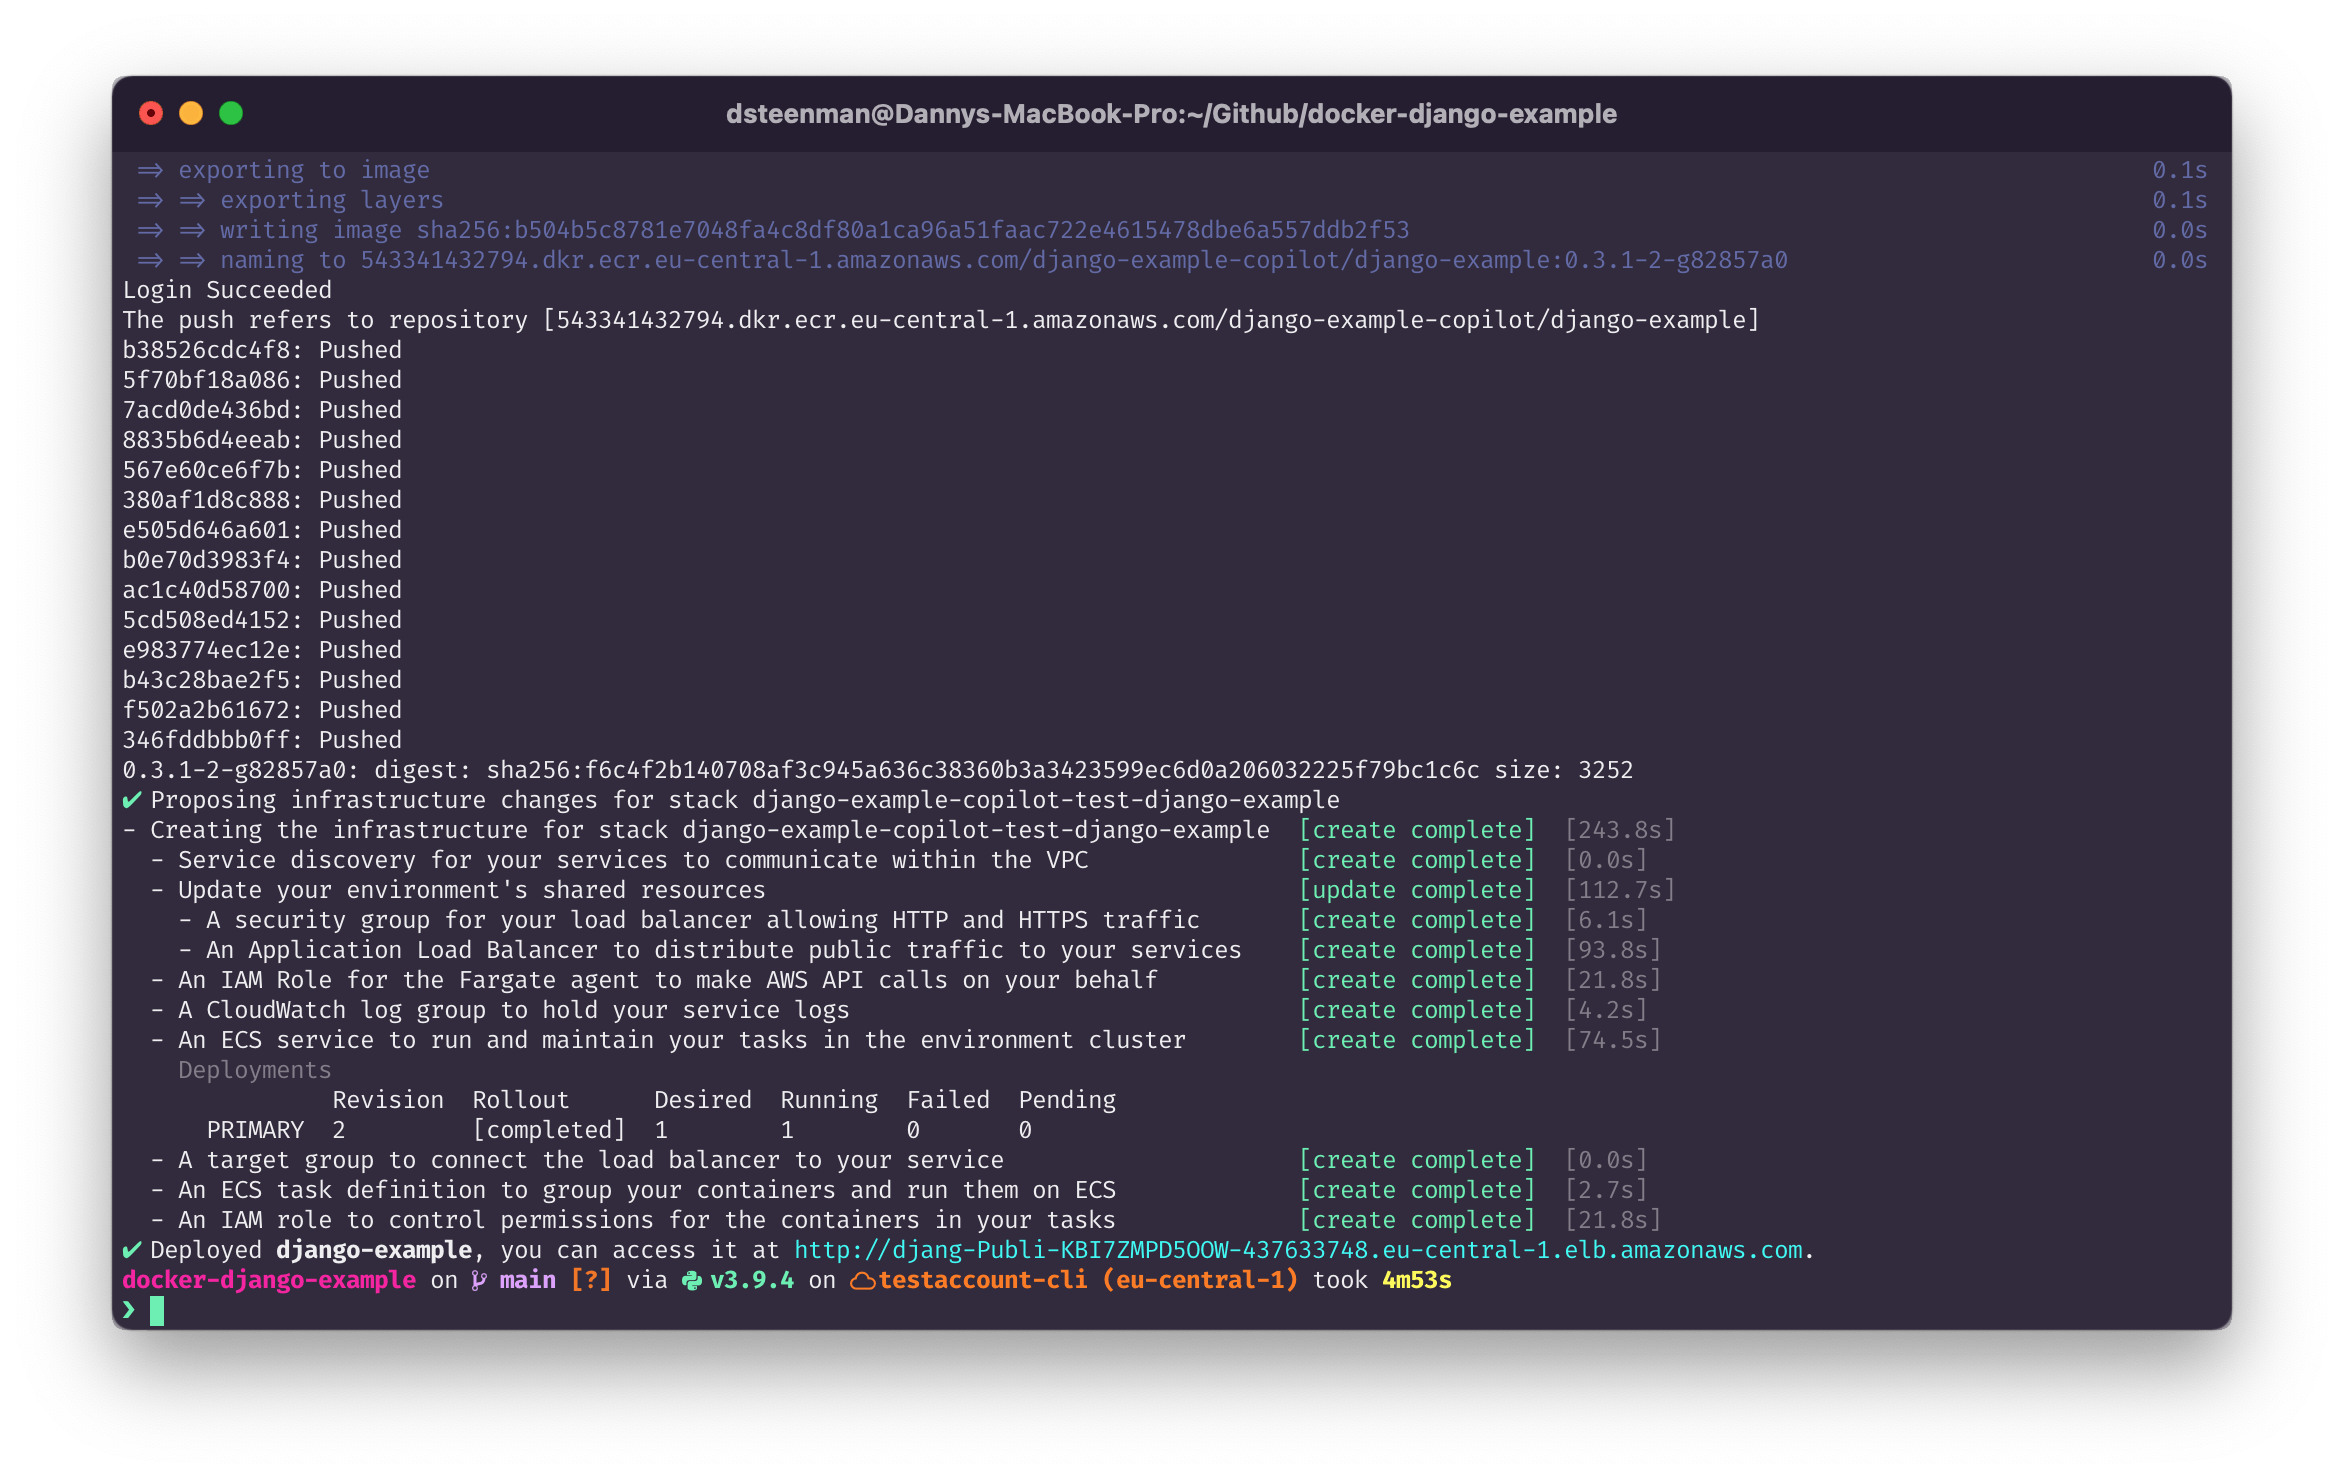
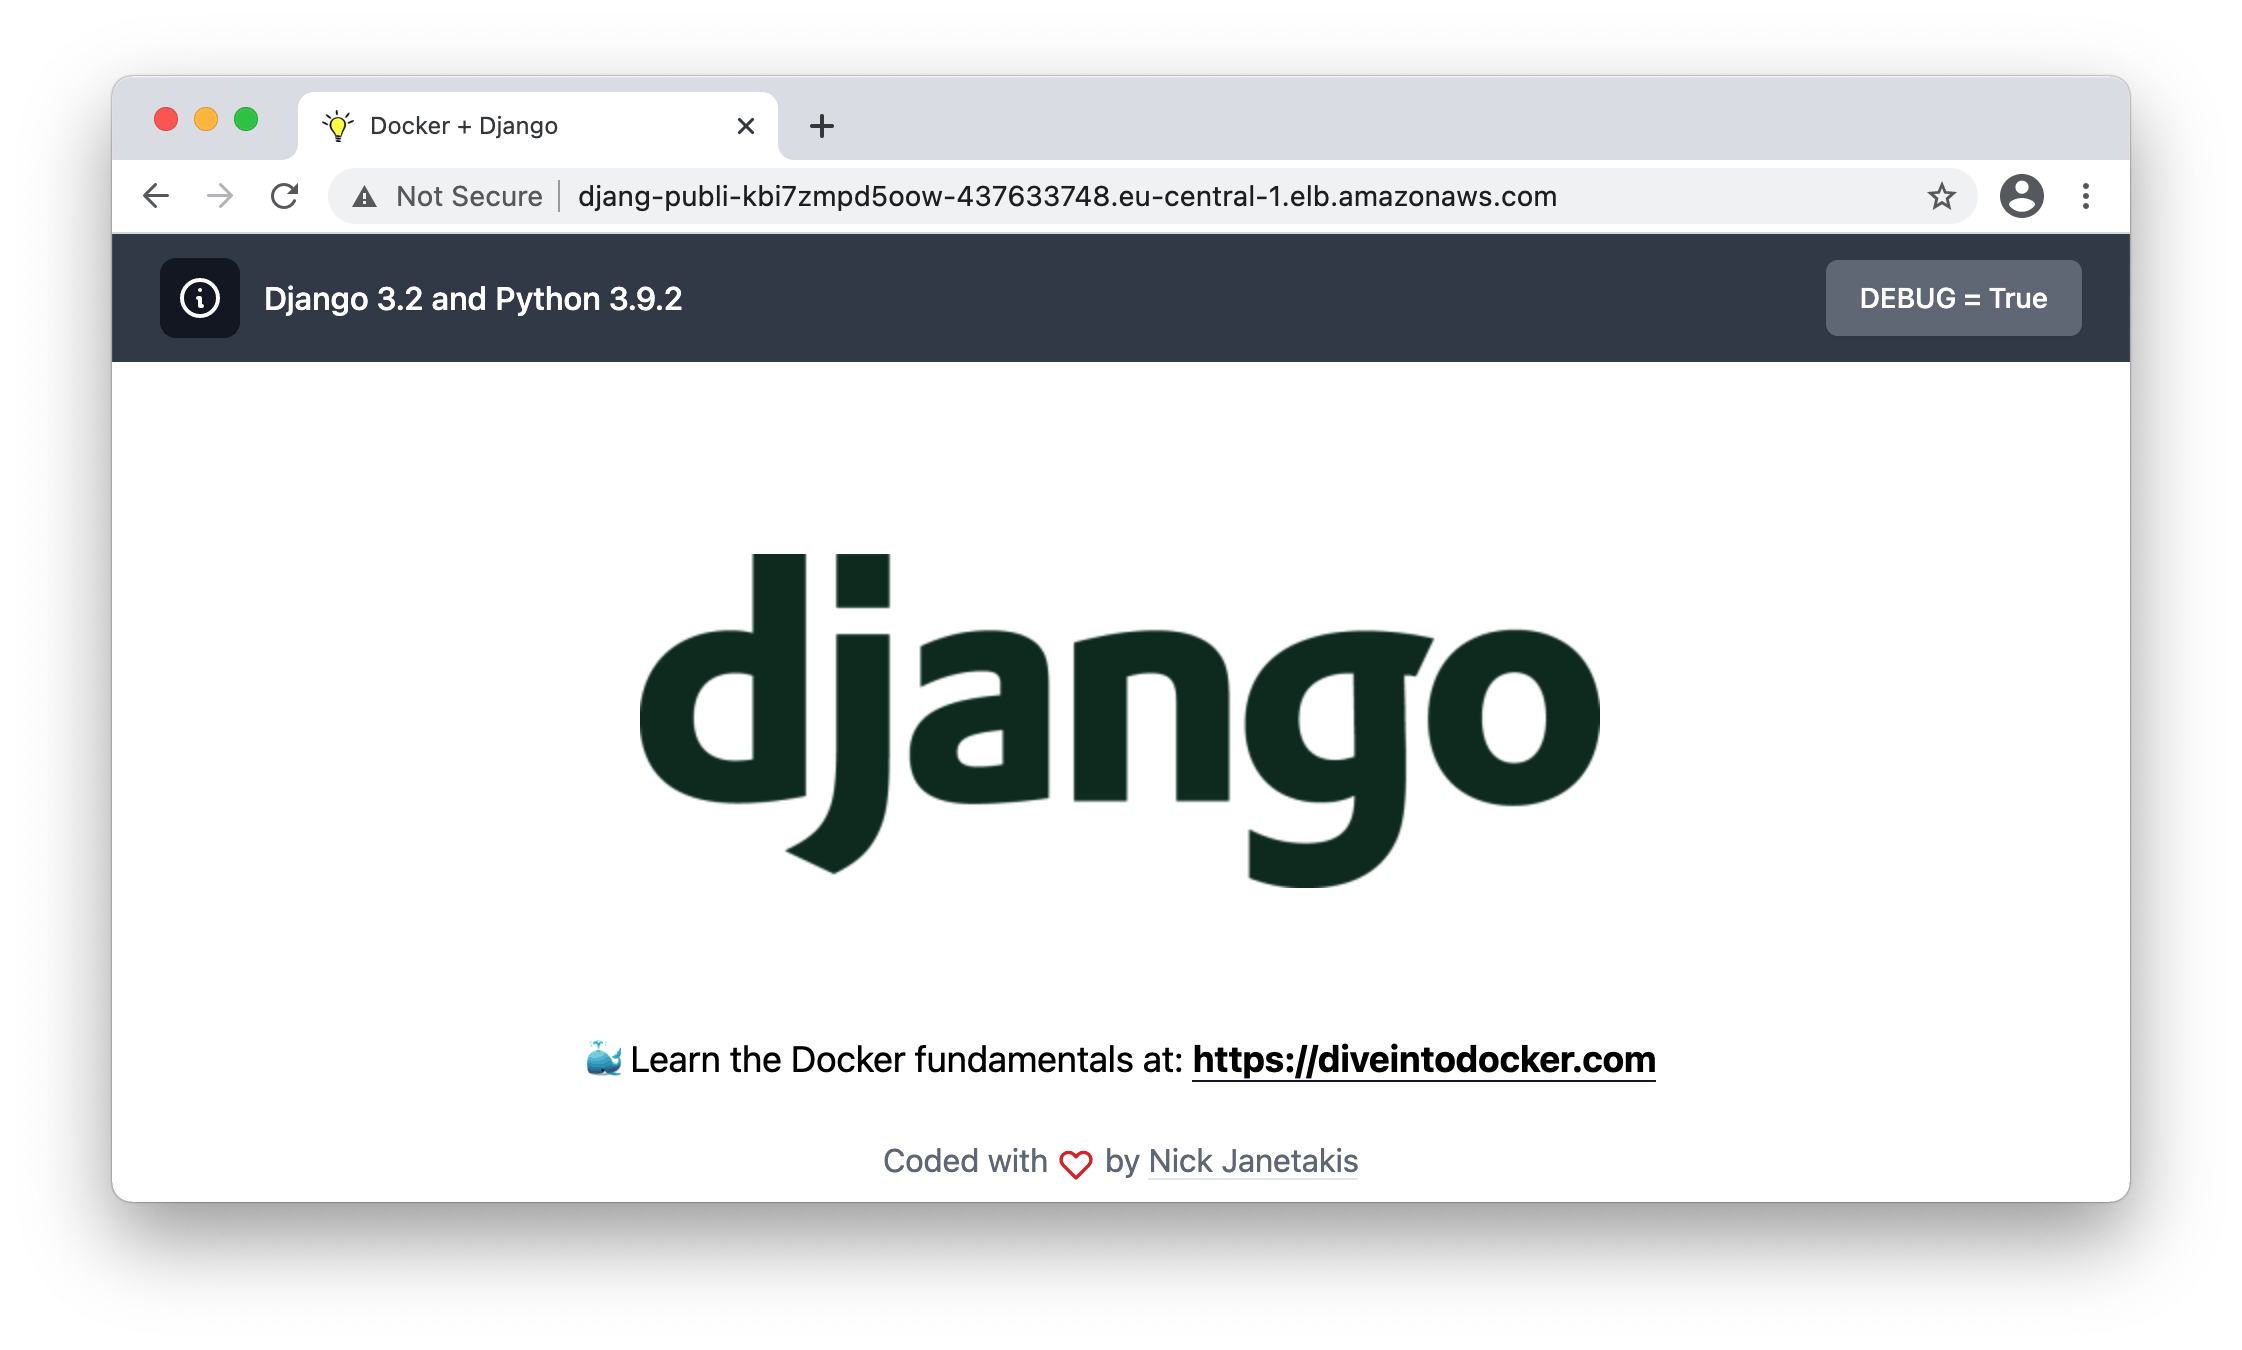
Once the deployment is finished it will provide the URL of the Application Loadbalancer and if you click it, you'll see the Django example app!
7. Login on the container
With copilot svc exec you're able to execute a command on the running container. This makes it possible to start an interactive bash session on the Django app by:
❯ copilot svc exec --name django-example --env test -c /bin/bash
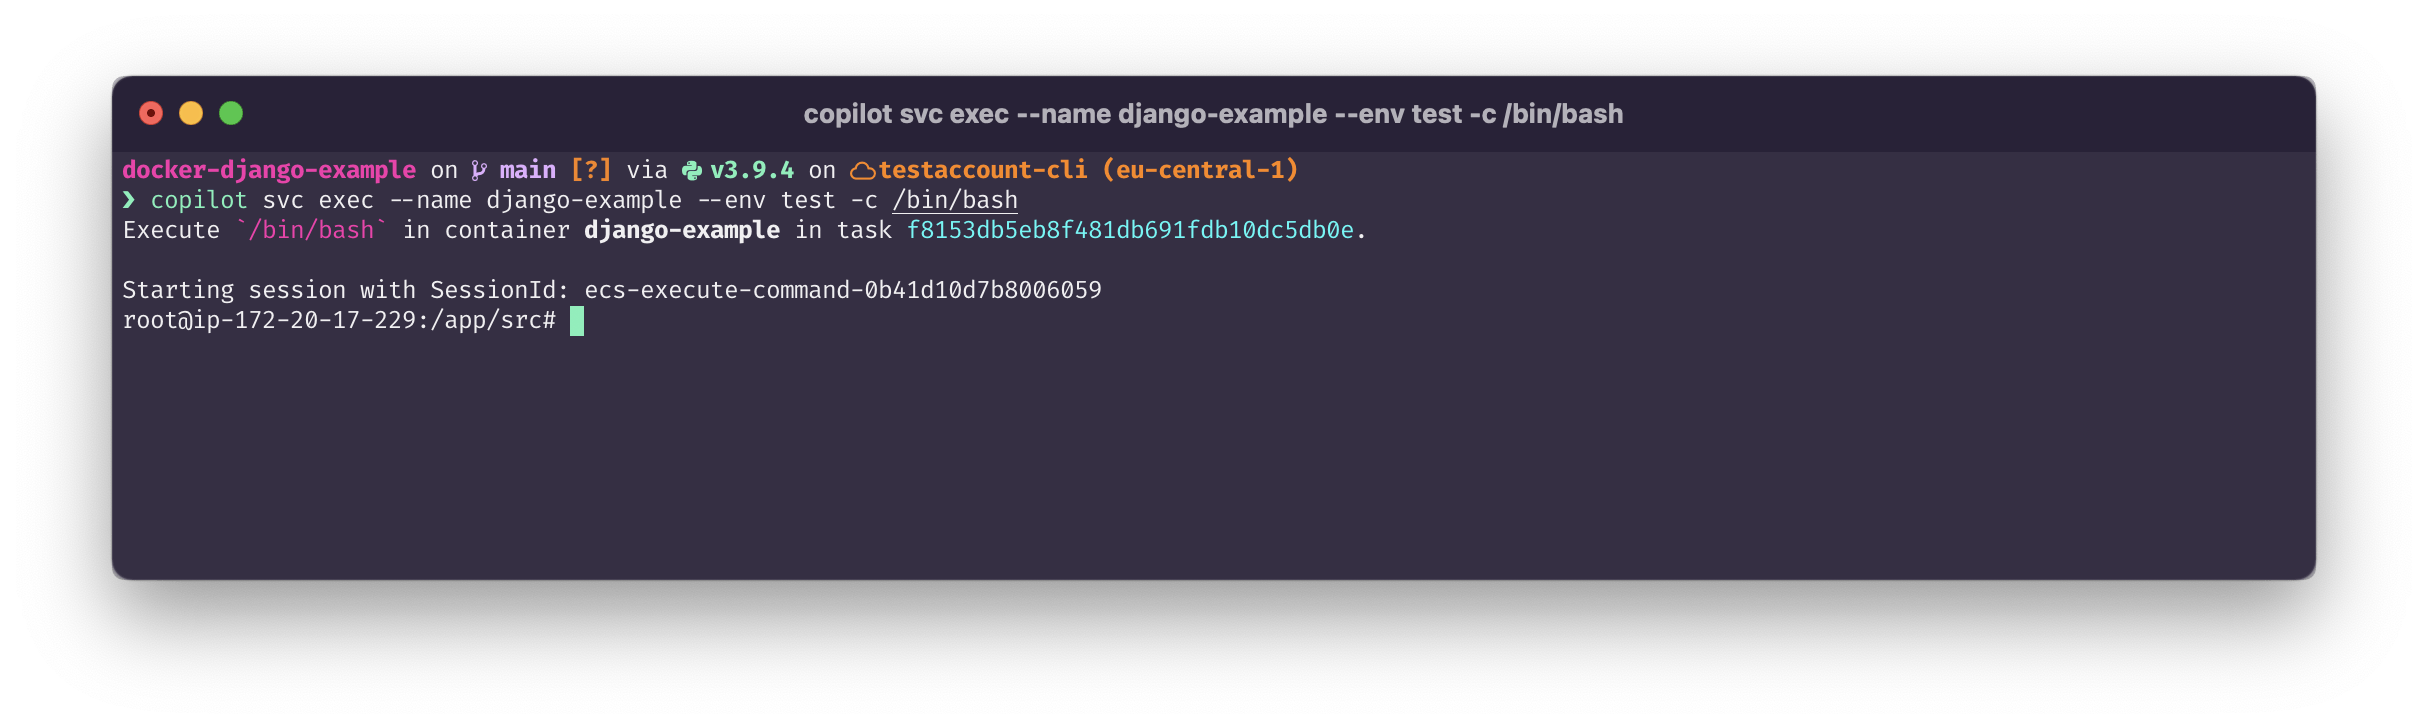
This is just as intuitive as running docker exec but then for containers hosted on AWS. The advantage of having this ability is that it will tremendously speed up your container development because you can log in on the container where you can test and troubleshoot issues instantly. Once you find anything in the container that needs optimization, you can then update the source file of the app in the repository and repeat step 6 to deploy your changes in the Cloud again.
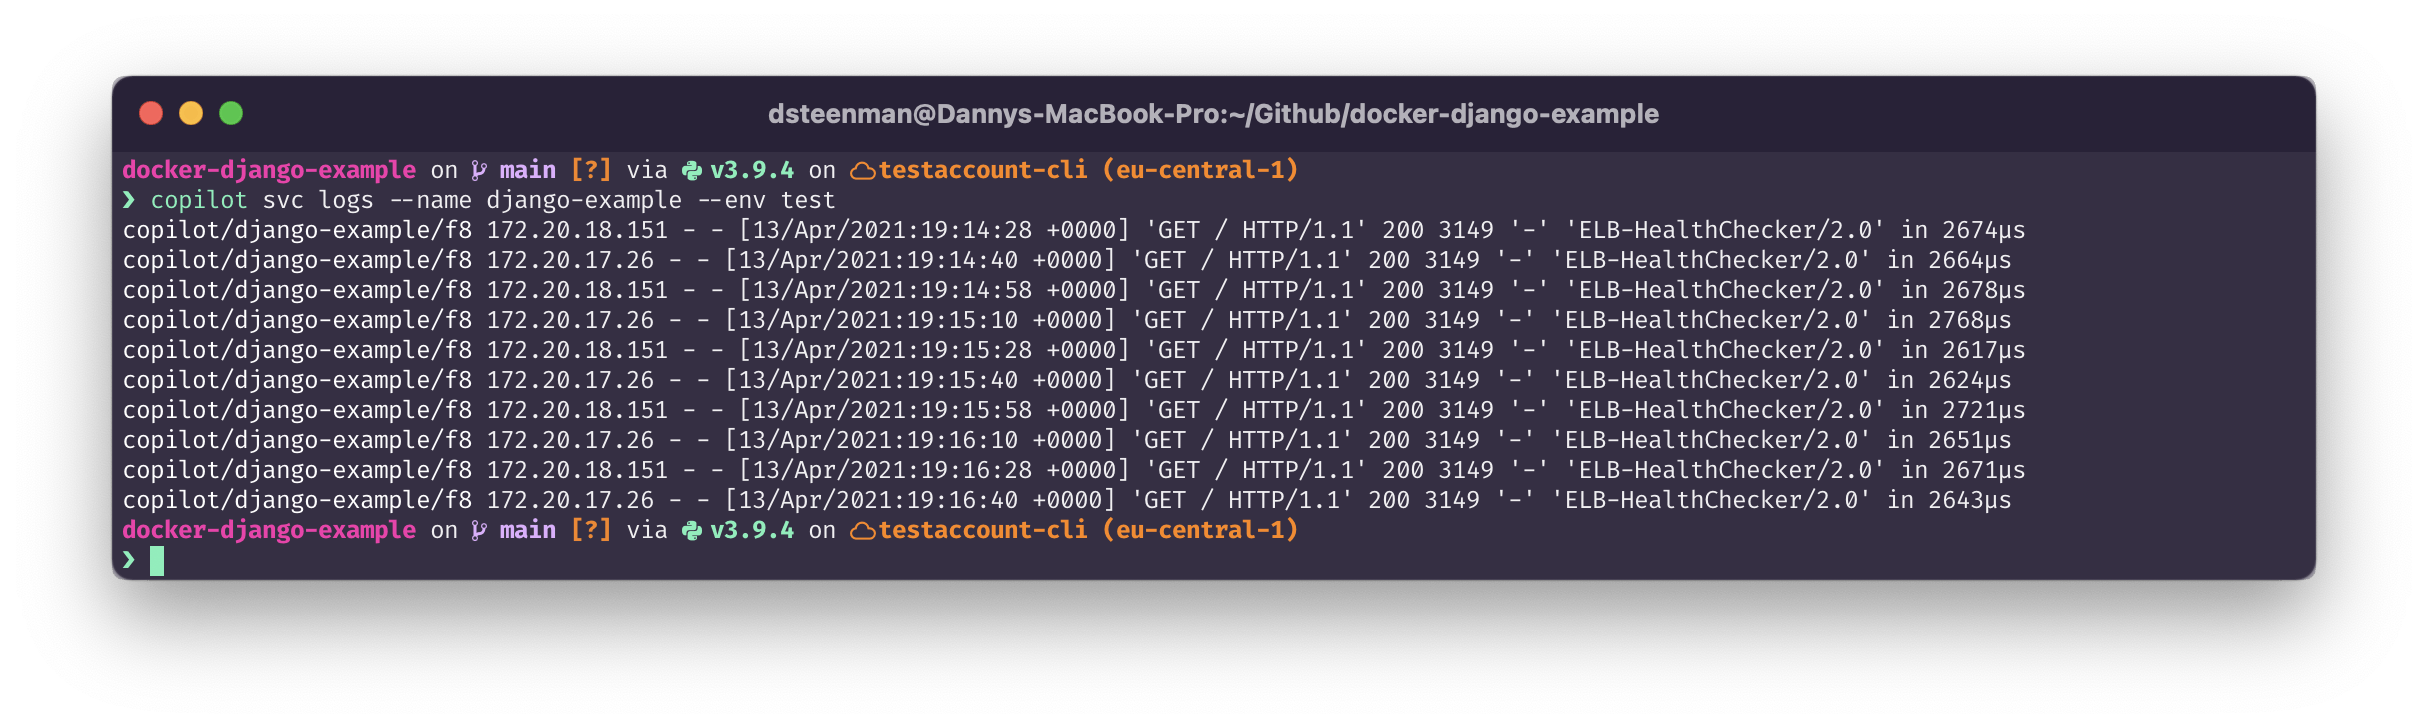
Optionally you can also display the logs of the container directly by running:
❯ copilot svc logs --name django-example --env test
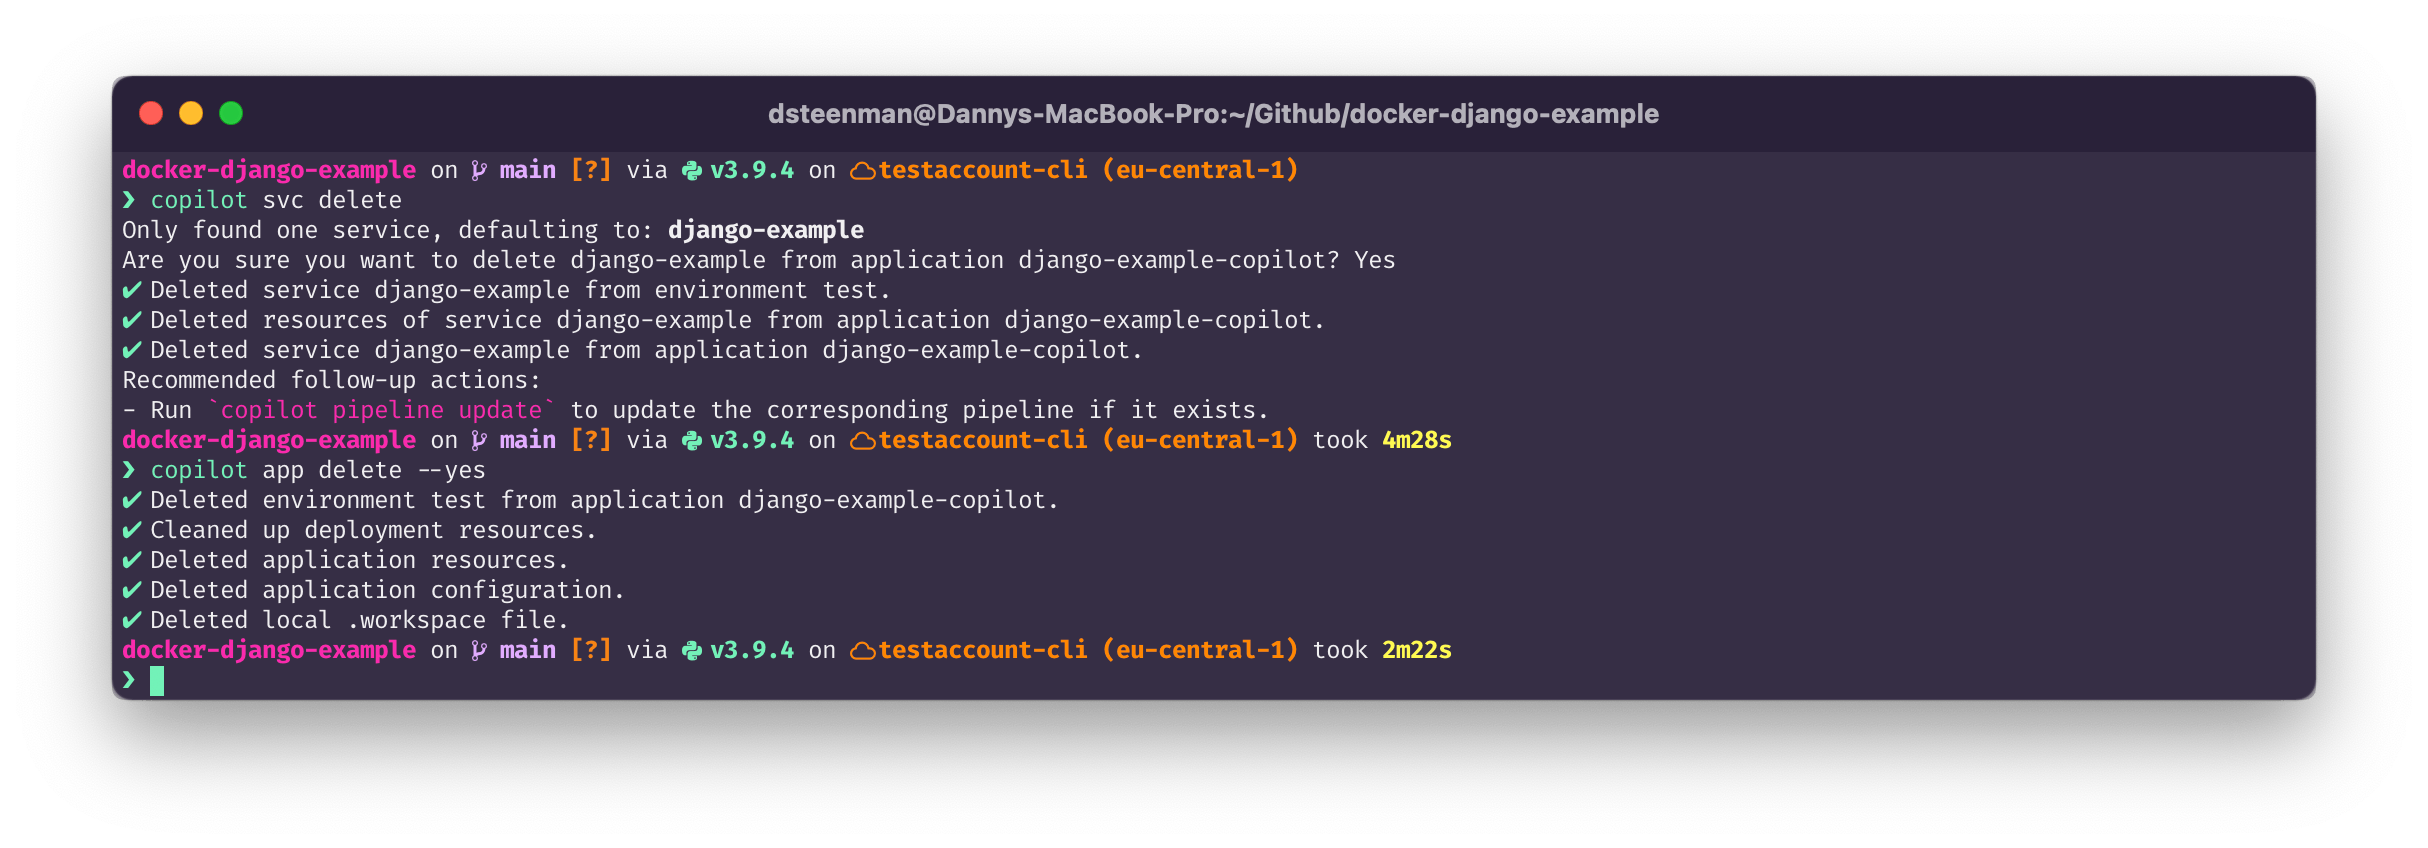
8. Wrapping up: Delete the service
If you're done with testing the container and want to clean up your AWS Copilot resources, we can delete the service by:
❯ copilot svc delete
Or better, if you want to delete everything we've created to run AWS Copilot, then we can:
❯ copilot app delete --yes
👋 Enjoyed this article? Reach out in the comments below or on Twitter to let me know what you think of it.
If you found some value in reading this, please consider showing your support by sponsoring me. Thanks to your support, I'm able to continue doing what I enjoy the most, which is sharing my learnings with the Cloud Community. Donate here 👇